
waterproof camping storage box setups work best when the box actually seals against rain, fits your campsite routine, and is not mistaken for a bear-proof food locker. For most car campers, the right box keeps stove parts, pantry basics, lights, and cleanup gear in one place so setup is faster and wet-weather mess stays under control.
Key Takeaways
- A true waterproof box needs a gasketed seal, dependable latches, and a lid shape that does not pool water.
- Most plastic trunks are weather-resistant, not fully waterproof, and many are not legal food storage in bear country.
- The best camping box size is driven by your stove, pantry, wash kit, and vehicle access, not just total liters.
- Harder-use campers should prioritize stackability, clean-out ease, and handles that stay comfortable when loaded.
Table of Contents
Why This Box Matters at Camp
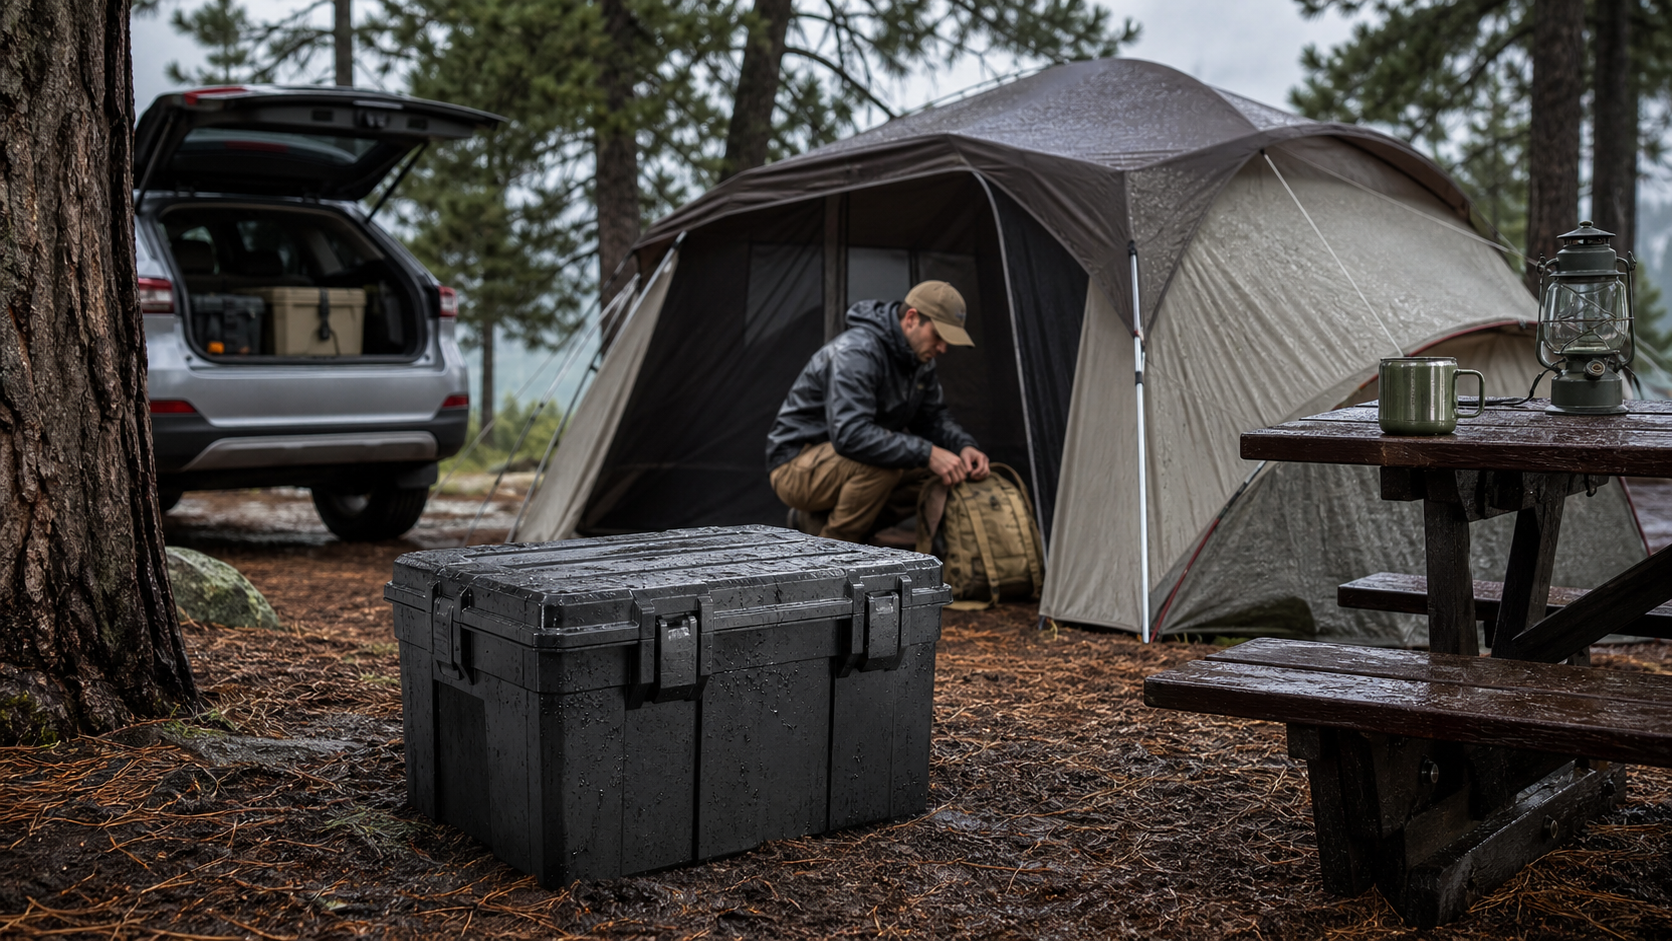
A good storage box does more than keep spare gear together. It cuts setup time, keeps muddy or damp items from spreading through the vehicle, and gives your camp kitchen or utility setup a home base. That matters most on family weekends, shoulder-season trips, and any campsite where you are opening and closing the same container several times a day.
It also helps you avoid the classic plastic-bin failure: one big tote with a loose lid, no internal order, and wet gear floating around after a storm. Outdoor Gear Lab’s camp-kitchen guide recommends building an organized kitchen bin you can grab and go, which is exactly the right mindset for a dedicated camp storage system. If your cooking kit is still scattered, pair this post with our guide to a camp kitchen organizer and our breakdown of an overland camp kitchen box setup.
The one thing a waterproof box does not automatically do is make food safe from wildlife. The National Park Service warns that scented items should be secured immediately at camp and not stored in a tent or backpack. In some parks, even a hard plastic box is not considered acceptable food storage. That distinction matters enough that it should influence what you buy.
6 Checks Before You Buy a Waterproof Camping Storage Box
1. Confirm Whether It Is Actually Waterproof or Just Weather-Resistant
This is the first filter. Many bins sold for garages, truck beds, or sporting gear are only weather-resistant. They can handle dust and light splash, but not a real downpour in the bed of a pickup or a soaked campsite table overnight. Look for a continuous gasket, compression-style latches, and brand language that clearly states waterproof or watertight performance rather than vague phrases like “rugged protection.”
If you want a benchmark for what true sealed protection looks like, hard-case makers like Pelican describe IP67 watertight construction, which is a much higher standard than a simple snap-lid tote. You do not need an expensive equipment case for every camping job, but that example is useful because it shows the difference between a real seal and a loose-fitting lid.
2. Match the Size to Your Actual Camp System
The right capacity depends on what lives in the box full time. A kitchen-focused box may need room for a stove, fuel accessories, spice kit, utensils, and a wash setup. A general gear box may only hold headlamps, tarps, repair items, bug spray, and spare layers. Measure the longest item first, then check whether the box opening is wide enough to load it without awkward diagonal packing.
This is where many campers overshoot. A giant tote looks efficient in the garage, then becomes miserable to lift once it is packed. If your water and cleanup gear travel separately, our collapsible water container camping guide and portable hand washing station camping guide can help you split bulky items into lighter modules.
3. Check the Latches, Hinge, and Stackability Under Real Weight
A box can have thick walls and still fail at the latch. Flimsy latches pop open when the bin is overloaded, and weak hinges start flexing after a season of hot-cold cycles in the trunk. If you stack gear in a vehicle, look for a flatter lid profile, reinforced corners, and a shape that stays stable when another tote or cooler sits on top.
This is especially important if your box rides beside a fridge or power setup. A stable lid makes it easier to build a cleaner cargo layout around items like a portable camping fridge without crushing lighter gear bags or forcing everything to shift every time you brake.
4. Prioritize Carry Comfort Over Empty-Box Specs
Many storage boxes look compact until they are full of cast iron, canned food, or wet recovery gear. Pay attention to handle spacing, grip shape, and whether two people can carry the box comfortably. Side handles that dig into your fingers or sit too tight to the body get old fast on rocky campsites.
If you camp out of an SUV or van, think through how you will slide the box out. Some campers do better with two medium boxes instead of one giant waterproof trunk because each can be opened without unloading the rest of camp. That modular approach also makes it easier to separate pantry items from recovery tools, or rain gear from dry sleeping gear.
5. Make Sure It Is Easy to Clean, Dry, and Repack
A good waterproof camping storage box should save time after the trip too. Smooth interior corners, a wipe-clean floor, and removable organizer pouches make a difference when pancake batter leaks or a coffee kit tips over. If condensation or damp dish towels end up inside, you want the box dry again before the next trip, not smelling like mildew two weeks later.
That is why many experienced campers keep soft waterproof items, like a waterproof dry bag backpack, for wet clothes or towel duty and reserve the hard box for gear that benefits from shape, protection, and repeatable organization.
6. Verify Whether It Is Suitable for Food Storage in Your Destination
This is the check most buyers skip. REI’s food-storage guidance says to keep food secured in your cooler or car during the day and use a metal bear box, vehicle, or approved method at night depending on local rules. The NPS also warns that some parks allow food in a closed vehicle only under specific conditions, while others require lockers.
Kenai Fjords goes further and explicitly says food should not be stored in tents, coolers, ice chests, plastic storage boxes, dry bags, or plastic bags because it is ineffective and illegal in that park. If you camp in bear country, check the local rules and, if you are shopping for a certified product, verify it against the IGBC bear-resistant products list. IGBC also notes that certification does not mean “bear-proof,” and an unlocked certified cooler is not bear-resistant in practice.
| Box Type | Best For | Strengths | Limits |
|---|---|---|---|
| Gasketed utility tote | General camp gear, pantry kits, vehicle organization | Affordable, stackable, easier to size-match to your cargo area | Often only water-resistant unless the seal and latches are strong |
| Hard waterproof equipment case | Electronics, camera gear, sensitive tools, first-aid supplies | Best sealing, best impact protection, dependable latch systems | Heavy, expensive, less efficient for bulky soft goods |
| Weather-resistant trunk | Bulky but low-risk gear like tarps, camp games, extra layers | High volume, lower price, easy garage storage between trips | Usually weaker seal, more likely to pool rainwater around the lid |
| Certified cooler or bear-resistant container | Food storage where regulations require approved methods | Better wildlife resistance when used exactly as required | Not every model is approved everywhere, and locking matters |
Which Box Style Fits Your Campsite
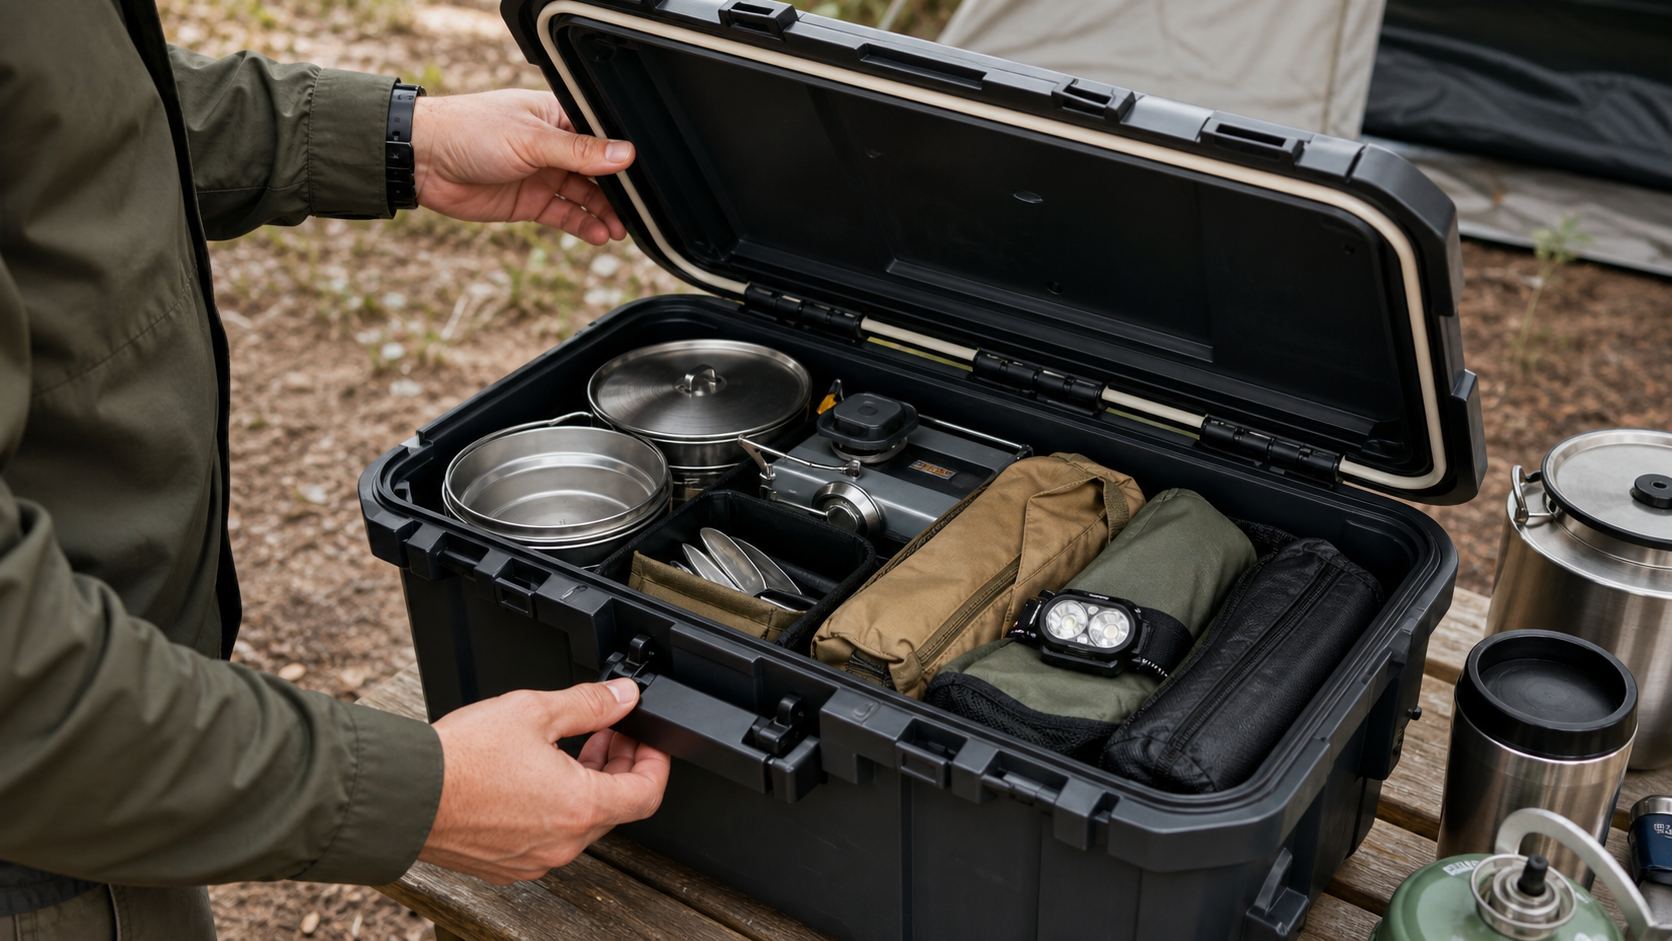
If you mainly camp from a vehicle and want one dependable grab-and-go container, a gasketed utility tote is usually the sweet spot. It is easier to justify than a premium equipment case and more practical than a huge loose-lid trunk. For camp kitchens, it keeps the most-used items together without forcing you to unload a pile of unrelated gear just to find your stove lighter.
If your trips involve electronics, camera batteries, or medication that absolutely cannot get soaked, a smaller hard waterproof case can live inside your larger camp system. That layered approach is often smarter than trying to make one giant box do everything.
For extended family or basecamp trips, some campers end up with two waterproof boxes: one “clean” kitchen box and one “dirty” utility box for cords, stakes, tarp clips, and repair gear. It sounds like more gear, but in practice it reduces clutter and speeds up teardown because every category has a consistent home.
Best Ways to Pack and Use It
The best packing method is vertical and visible. Group items by task, not by shape. Put all coffee gear in one pouch, all dishwashing items in another, and all lighting or battery accessories in a third. Heavier items go low, small frequently used items stay near the top, and anything damp gets isolated so it does not soak your dry pantry or clothing.
At camp, treat the box like a workstation rather than a sealed vault you constantly dig through. Set it where rain runoff and foot traffic will not hit it, wipe the lid before opening in wet weather, and close it fully between uses. That sounds obvious, but half of “my waterproof bin leaked” stories start with debris on the gasket or a lid left half-latched while someone rushed dinner prep.
If you are building a more comfortable car-camping layout, combine a waterproof storage box with your water, cold-food, and hygiene systems rather than forcing all three into one overloaded container. That keeps the box easier to lift and prevents cleanup gear from contaminating your food kit.
Common Buying Mistakes
The biggest mistake is buying by volume alone. A 90-liter box sounds efficient until it barely fits in your hatch and takes two people to move. The second mistake is assuming any hard-sided bin is automatically good enough for rain and wildlife. Those are separate problems, and they require separate solutions.
Another common miss is ignoring lid shape. A flat lid may stack well, but if the gasket channel is weak or the rim collects grit, water finds a way in. Also watch out for boxes with clever organizer trays that steal too much main-compartment height. A practical camping box should still fit awkward real-world items like a stove hose, nested cookware, or a compact lantern case.
Finally, do not turn a waterproof camping storage box into a long-term wet locker. Dry it out after trips, crack it open in the garage, and remove food crumbs, dishcloths, or spilled drink powder before the next run. Waterproof only helps when the moisture is outside the box, not trapped in it.
Helpful Add-Ons Worth Considering
Affiliate disclosure: Some of the product links below are Amazon affiliate search links. If you buy through them, BugFreeCamping may earn a commission at no extra cost to you.
You do not need to over-accessorize this setup, but a few supporting pieces can make a box more useful in the field:
- Search waterproof camping storage box options on Amazon if you want to compare gasketed totes and hard cases side by side.
- Look at weatherproof gasket totes for affordable pantry or utility-box builds.
- Browse hard waterproof equipment cases if you carry batteries, camera gear, or medical items that cannot get wet.
- Add camping bin organizer pouches to stop small gear from becoming one loose pile.
- Keep desiccant packs handy for electronics or shoulder-season moisture control.
If you camp mostly in wet climates, spend extra money on the seal and latch quality first. Fancy divider systems matter less than a lid that closes cleanly every time.
FAQ
Is a waterproof camping storage box the same as a bear-proof box?
No. Waterproof protects gear from rain or splash. Bear-resistant approval is a separate standard tied to specific products and local land-management rules.
What should I store in a waterproof camping storage box?
It works best for camp-kitchen tools, lighting gear, repair items, first-aid supplies, and other equipment you want organized and protected from weather. Avoid assuming it is a legal overnight food locker unless local rules say so.
How big should a camping storage box be?
Pick the smallest size that fits your longest must-carry item plus a little room for organizer pouches. Medium boxes are usually easier to lift, stack, and access than one oversized trunk.
How do I keep moisture from building up inside the box?
Dry damp items before repacking when possible, wipe the gasket clean, leave the box open after the trip, and use small pouches or desiccant packs for sensitive gear.